Before you start

See the invisible

Right now, tiny particles are shooting straight through you. Through your chair, the walls, this screen, your hands. You cannot see them or feel them. The MiniPIX detector can. In a few minutes you will watch them appear on a screen, one by one.

A quick read first, then make your predictions to take to the detector.

Start

Theory

Here's what you need to know what the detector is looking at.

What radiation is

Radiation is energy leaving an atom. It comes out either as waves, like X-rays or gamma rays, or as fast-moving particles, like alpha or beta. The kind that carries enough energy to knock electrons off other atoms is called ionising radiation, and that is exactly what the detector can see.

A common mix-up is treating light as something separate from radiation. Visible light is actually a form of radiation, just with too little energy per photon to ionise atoms. Gamma rays, X-rays, and ultraviolet light are all part of the same family of electromagnetic waves. The detector responds to the high-energy end of that family, not the visible end.


Four types to know

Tap each card. The front names the particle. The back shows what its track looks like on the detector.

What about X-rays? X-rays sit between ultraviolet light and gamma rays on the electromagnetic spectrum. The detector can see them too. Unlike gamma, which comes from nuclear transitions, X-rays are produced when fast electrons slow down or when electrons jump between shells in heavy atoms. On the detector they look similar to gamma, scattered single-pixel dots, so the two are hard to tell apart without energy calibration.

How far each type gets through matter

Each type is stopped by something different. Alpha is the easiest. A sheet of paper, or just a few centimetres of air, blocks it. Beta gets further and needs a few millimetres of aluminium. Gamma is the hardest of the three, and it takes thick lead or concrete to stop it. Muons are in a league of their own. They can pass through hundreds of metres of solid rock.

Click a particle name to fire it. Watch where it stops.

Click a particle name to fire it.

Adapted from MEDRA project guide (C. Cabo, MediPIX / CERN).

It is all around us

You do not need a special source to find radiation. It is everywhere, all the time. For most people the biggest natural source is radon, a gas that seeps out of the ground and collects indoors. Add to that radiation from rocks, from food, and from space.

About 80 percent of the radiation an average person meets in a year is natural, and the total can vary by more than a hundred times depending on where you live. Radiation is normal. The job is to measure it, not to fear it.

From space

Some radiation arrives from space. Cosmic rays are particles travelling at nearly the speed of light, mostly protons, coming from the Sun and from violent events far away such as exploding stars. When they hit the upper atmosphere they smash into atoms and create showers of new particles. The muons you saw on the flip card are one of those secondaries. The higher you go, the more of them there are.

True or false?

These are common ways of thinking about radiation that turn out to be incomplete or wrong. See which ones you recognise in your own thinking before you start measuring.

What else around you could you test with the detector? Do you have your own idea?

Check with your teacher before you try it.

The Detector

What you need to know before using it.

What it is

The MiniPIX is a tiny radiation camera. It was designed at CERN, the giant physics lab in Switzerland, and the same kind of chip is used in space to watch the radiation around astronauts. What it does is turn something invisible into a picture you can see.

MiniPIX detector

How it sees radiation

Under the cover is a grid of tiny squares called pixels, 256 across and 256 down. When a particle shoots through, it switches on the pixels in its path and leaves a mark. Counting and reading those marks is the whole game.

256 × 256 pixels   up to 45 frames per second   1 ms minimum exposure

Different particles leave very different marks. Go back to Theory to see how the tracks compare.

Pixet Basic

You control the detector with a program called Pixet Basic. Tap the numbered markers below to find out what each part does.

Pixet Basic software window

Tap a numbered marker to find out what it does.

Handling and safety

  • The sensor is fragile. Keep the cover on whenever you are not measuring.
  • Never touch the sensor. Never rest a sample on it. Keep it dry.
  • For measuring the room, point it upward, away from falling dust.
  • If it gets wet or dirty, stop, put it away, and tell your teacher. Do not wipe or blow on it.

The radiation you will measure is the natural, low-level kind that is around us all the time. The care here is to protect the instrument, not because the samples are dangerous.

Exponential decay

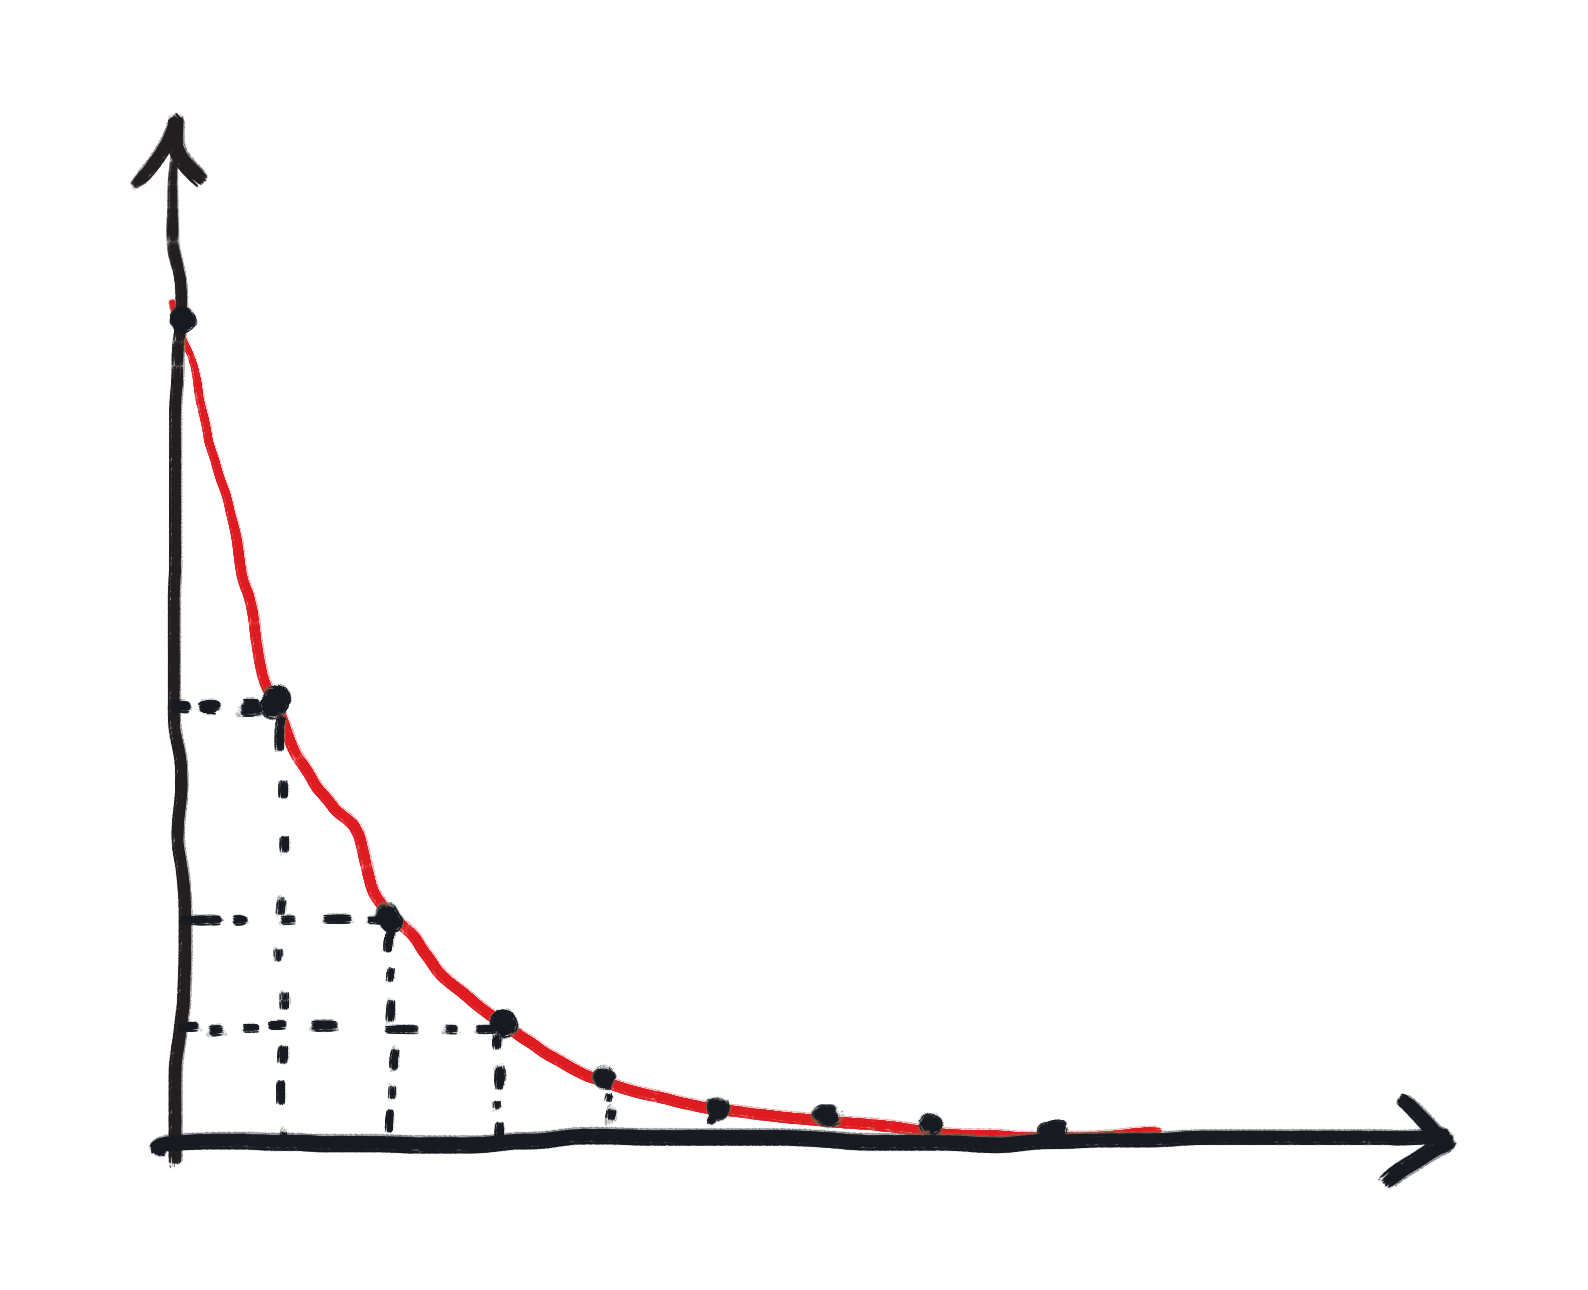
Several activities ask you to watch a count fall over time. The pattern it follows is called exponential decay, and it is one of the most recognisable shapes in science. Understanding it before you measure will help you know whether your data looks right.

Every radioactive nucleus has a fixed chance of decaying in any given second. That means the more nuclei you start with, the faster the count falls. But as the count falls, so does the rate of falling. The result is a curve that drops steeply at first and flattens out, always halving in the same amount of time. That fixed time is the half-life.

When you measure with the detector, you count particle hits per unit time rather than nuclei directly. The shape is the same curve, but the axes change. Your counts will start high and fall in the same halving pattern. Small bumps and dips are normal, because radioactive decay is random and each measurement has natural scatter.

Exponential decay curve showing count falling steeply then flattening over time

The key idea to carry to the bench

If your count is falling and the fall is slowing down, you are looking at exponential decay. You do not need to see the full curve to recognise it. A few points that roughly halve over equal time intervals is enough. In Activity 3 the half-life is roughly 50 minutes. In Activity 4 you will use your count to estimate a half-life that is over a billion years.

Activities

Each one starts with a question and a guess. When your teacher says go, open the worksheet and fill it in as you measure.

Activity 01 Illustration for Activity 1

Is an empty room really empty?

Switch the detector on with nothing in front of it. Most people expect a blank screen. Watch what actually shows up. You will learn to read the tracks at the same time.

Open worksheet
Activity 02 Illustration for Activity 2

Can a banana be radioactive?

Test everyday food and kitchen items, banana, coffee, salt substitute, and see which ones make the detector light up more than the empty room. The reason why is hiding in your lunch.

Open worksheet
Activity 03 Illustration for Activity 3

Radon in the air

Rub a balloon with wool and leave it hanging in the room. Then hold it near the detector. Something invisible in the air has been sticking to its surface.

Open worksheet
Activity 04 Illustration for Activity 4

How slowly does potassium decay?

Measure a pinch of salt substitute and count the electrons it gives off. Then use your count to work out how old the universe would have to be for half of it to disappear.

Open worksheet
Activity 05 Illustration for Activity 5

Pulling radon out of the air

Run a vacuum cleaner for a few minutes, then put the filter near the detector. Compare a room before and after you open the windows.

Open worksheet
Activity 06 Illustration for Activity 6

Does radiation increase with altitude?

Compare detector images from the Earth surface, an airplane, and a satellite. Use track density and shapes to work out what changes as the atmosphere gets thinner.

Open worksheet